Coloring medium brown skin
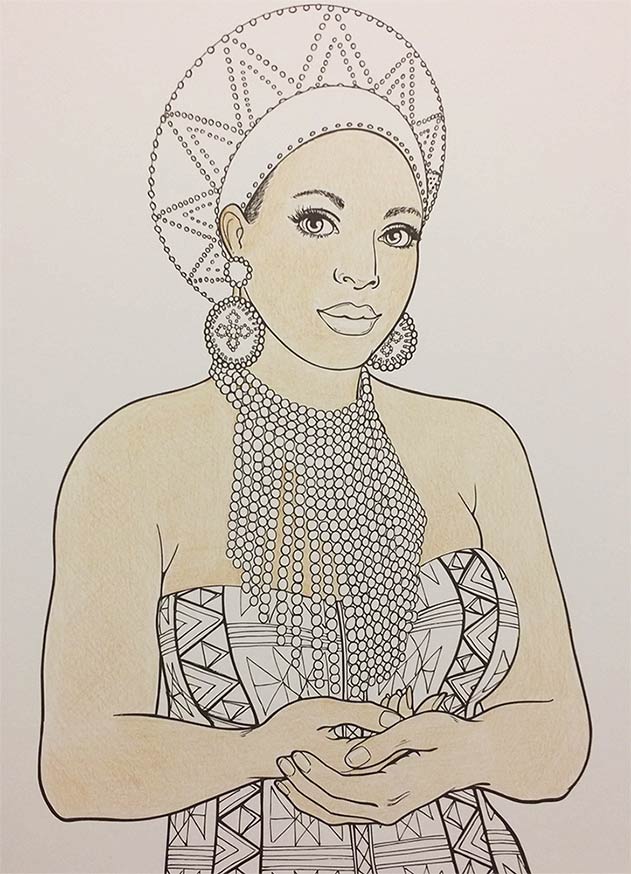
The South African woman is from my book, Color Me Beautiful, Women of the World.
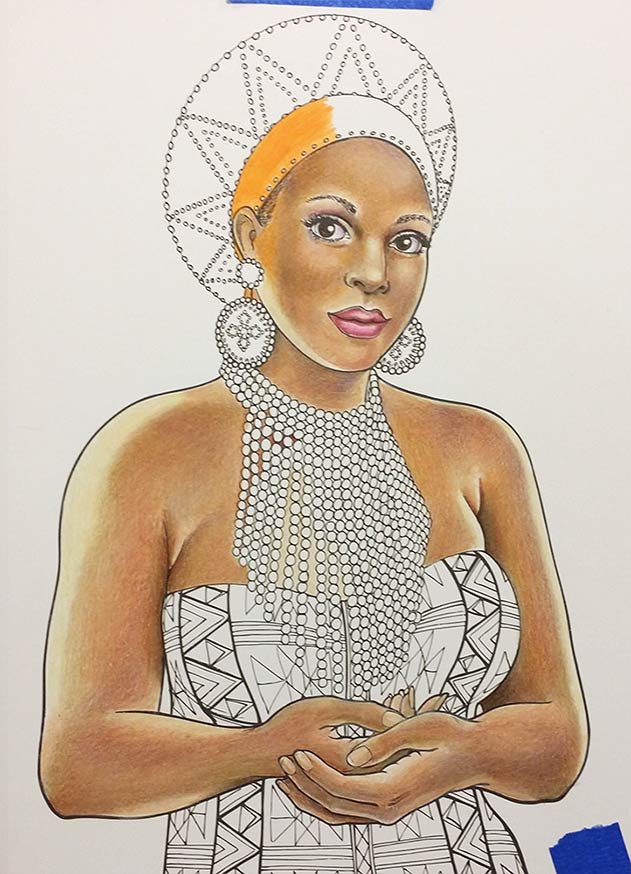
I started this picture by printing it out on a sheet of Strathmore Bristol. This is the same paper that I use to make the original illustrations. I planned on using my new Lyra Skin Tone pencils, but I found they came out of the box with a blunt point and the cone of the point was not smooth... and they were too big for any of my pencil sharpeners. I whittled down a medium brown color so I could sharpen the point (sorry but Lyra does not put a name or number on their pencils) and used it for a light base tone on the picture.
It came out far more yellow than the lead indicated. One day I might get around to sharpening all the pencils but I couldn't be bothered this time so back into the drawer they went and out came the Prismacolors.
Below I use Prismacolor dark brown, to add shadows and contours.
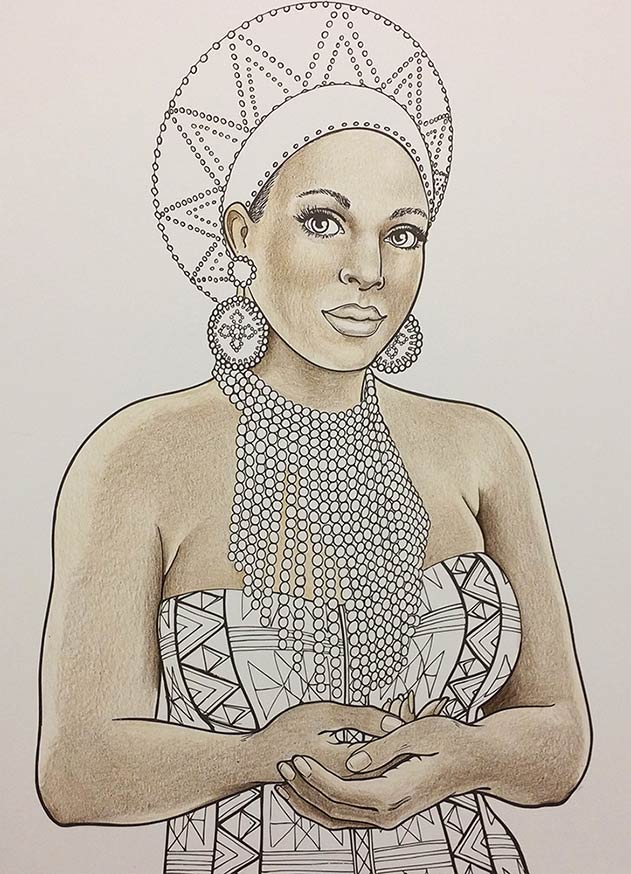
I colored in the lips and eyes, and added a bit of the same pink I used in the lips to add blush to the cheeks, eye sockets, between the eyes, shoulders, etc.
I used terra cotta PC944 to make the skin tone more brown.
I blended the color and all my white areas turned YELLOW. The Lyra pencils blend nicely but remember, I used a medium brown pencil and now all my white areas are pale yellow. That was not my intention AT ALL.
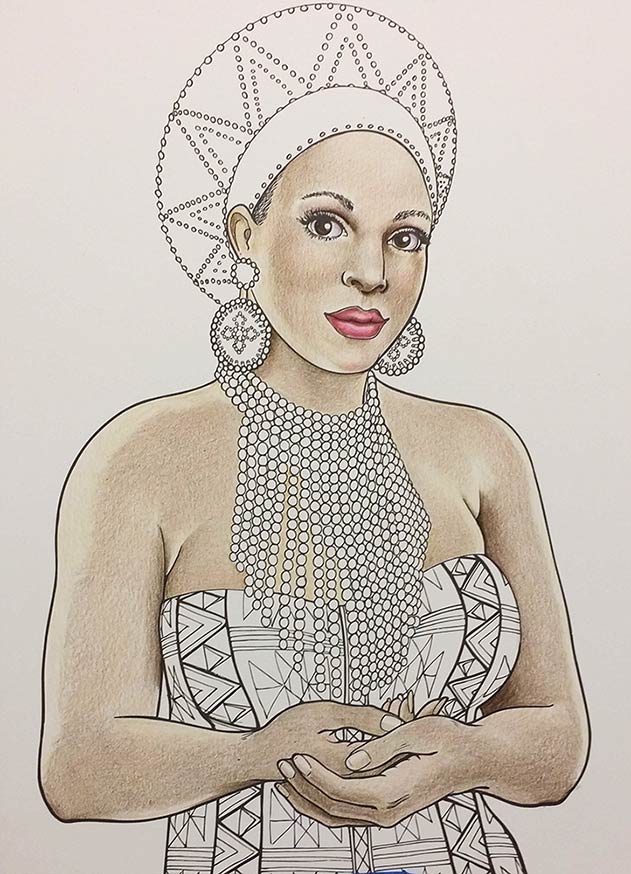
Being an artist isn't all about doing things correctly the first time, a big part of it is learning to deal with accidents and mistakes. Now I have a glowing yellow african woman. My plan of using blue to bring out the highlights would no longer work! W hat do I do?
I punch up the pinks is what I did. I threw in some deeper reds on her cheeks, her arms, shoulders and chests. I used green next to the highlights and purples to deepen the darkest shadows. So far, so good. Then I made an even bigger mistake and decided to add orange as a reflection from her hat. That did not work :(
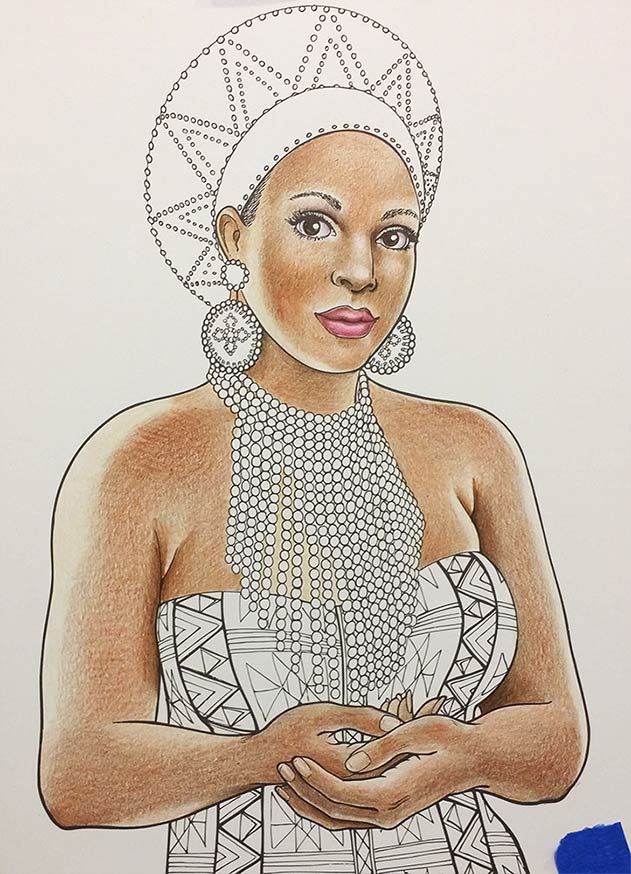
Fortunately, wax based crayons can be removed with the flat edge of an industrial razor. Not completely... but enough to tone down that garish color to just a hint of a reflection. I could live with that. I stepped back and like a chef does his final seasoning I added a touch of color here and there... more red on the face, a blush of magenta along the hairline, deepened the shadows of the eye sockets, added a few dots of gold inside the eye, and lightly burnished the skin one last time. Then, with colored pencils and gel pens, I colored her hat, beads, and dress. The background is from a cheap set of ELF eyeshadows, blended in with a paintbrush. One thing I do is go over some of the lines with a thin black marker. Colored pencil can dull those lines, and you get a nicer, more three dimensional look if you punch them up a bit. I re-traced the eyes, a bit of the eyebrows, the line in the center of the mouth, the outline of her face, and her hands.
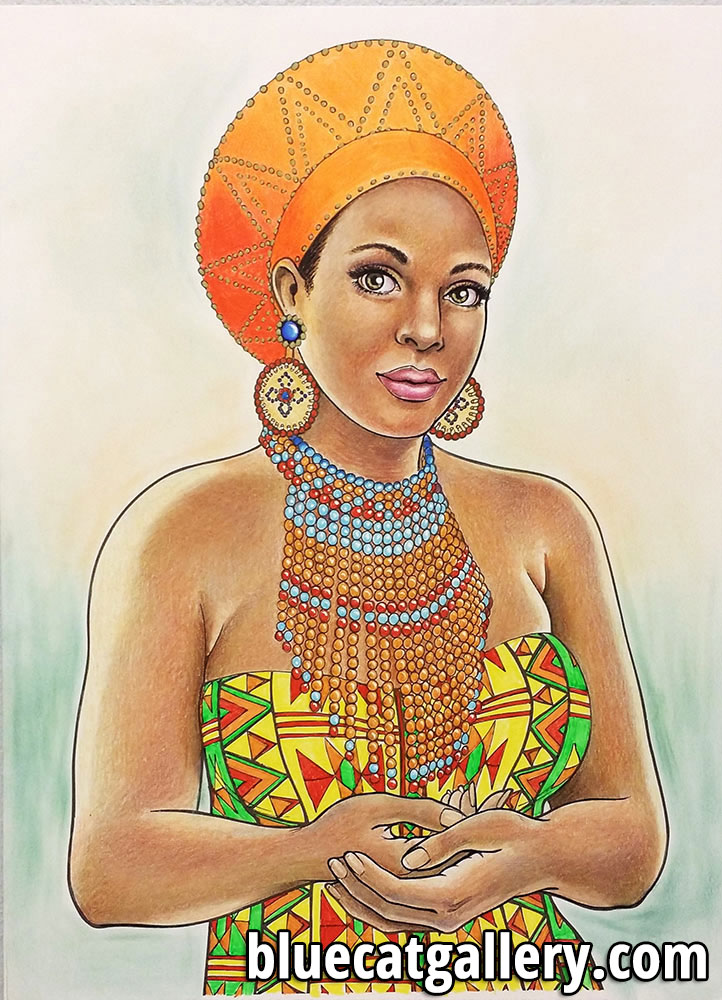
Even though I like the way this picture came out in the end, it is different from what I planned when I started. I see all the flaws in this picture and I have shared them with you as a lesson: don't be afraid to play, and don't panic if you make mistakes. Even if you totally screw up, just wrinkle up the paper, toss it away, and try again.
If you are interested in trying your hand coloring, you can visit my gallery page to download a free sample and print it, or buy my book from Amazon.